Features
Guide to Metal Studs Framing
Tips for building basement and partition walls with steel studs.

Metal studs are cold-formed steel components used for framing basement and partition walls just as regular wooden apparatuses. They are mainly used to support non-load-bearing walls.
On the other hand, metal stud framing is the process of erecting walls and panes using cold-steel components. Metal stud framing has two major apparatuses – the stud and the truck.
Heavy gauge metal studs are used in load-bearing walls and structural applications such as exterior walls, while lighter gauge metal studs are used in non-load-bearing applications such as some interior walls.
Also known as light-gauge steel framing, metal stud framing is a great alternative to wood framing.
Metal Studs in Wall
Metal studs are mostly intended for use in basement walls. However, they can also be used in the design of partition walls or other parts of simple metal structures.
Metal studs are used to support a non-load-bearing wall.
Metal Studs Vs. Wooden Studs
Metal studs are increasingly popular among builders thanks to the following benefits:
Termite Resistant: Unlike wooden components, metal studs cannot be destroyed by termites – which eliminates the need for pest control measures
Lightweight: Metal studs are hollow and lightweight, which makes them easy to work with.
Sustainability: Steel is one of the most sustainable construction materials in the world. Since all metal studs are 100% recyclable, any waste is easily sold to a recycler for reprocessing.
Metal Stud Framing Guidelines
The metal stud framing process begins by creating a layout that determines where different partitions in the structure will be placed.
At the end of the project, the partitions determine what areas make open spaces, and rooms, as well as the location of doors and windows.
To undertake the project, a builder takes the metal studs and places them together to make the wall skeleton. There are generally two types of metal studs: U studs and C studs.
U studs, which take the shape of the letter U, are designed to sit on the floor and ceiling of an installation. Their work is to hold C studs in their place – at the end of U Studs and certain points along the middle.
This helps to create a central support system before a builder can add the drywall to keep it straight.
RELATED: How to Install Metal Roofing
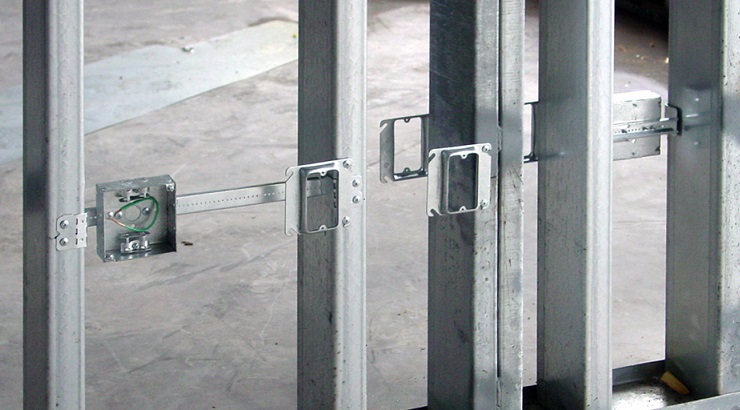
Once the set-up is done, a builder can now start taking essential steps of assembling the partition. This includes fixing wiring, cables, and ventilation before adding the drywall and other components.
Metal Studs Sizes
Most retail outlets usually stock metal studs in dimensions that match 2×4 wood studs in lengths ranging between 8 feet and 12 feet. Standard metal studs use 25-gauge steel.
More information on metal stud sizes:
- Standard metal stud sizes range from 2.5 inches to 14 inches.
- Flanges (side sections) range from 1 3/8 inch to 3 inches.
- Knockouts range from 3/4 inch to 1 1/2-inch diameter.
Metal studs usually come with keyhole knockouts in place for electrical cables to save you the trouble of screwing into metal studs to create a way for the cables.
Metal Studs Framing Tools
- Measuring tape
- Aviation metal snips
- Plumb bob (plummet)
- Builder’s level
- Drilling machine
- C-clamp locking pliers
- Sheet metal locking pliers
Based on your project, you may be required to add more tools.
Metal Studs Installation Process
1. Lay Out the Wall
On the floor, define the position of the wall, and snap chalk lines to mark the edges of the wall. Chop the runner at the edge of the entry opening. Fix the runner to the floor. Fasten to concrete with concrete screws.
2. Move the Runner
Transfer the runner to the ceiling by twisting a stud into the floor runner and holding a level against it. Mark the stud’s edges on the ceiling at each end of the wall, and join the marks with a chalk line.
3. Attach the Runner
Fasten the runner to the ceiling by driving screws into the beams. In case the wall runs parallel to the beans, add blocking for a wood wall.
If you plan to attach ceiling drywall to the base of a roof truss system, experts recommend a special tough channel design that withstands the potential movement of the truss.
4. Lay Out Stud Placement
Mark the metal stud areas on the edge of the bottom runner, using an indelible marker and a wooden bar whose length equals the spacing of the stud.
It is advisable to mark one edge, and then mark a quick X where the stud goes to avoid confusion. It is not a must to mark the upper runner.
Be sure to double-check the spacing of the layout before attaching any studs.
5. Cut the Metal Studs
Using aviation metal snips, cut the metal studs to length if necessary.
6. Make a Header
Cut the length of the runner 4 inches longer than the opening. Make a line square across the web two inches from one side, and an extra line square across at the opposite side to define the span of the opening.
Cut V-notches into the side sections, pointing at the lines on the web. Twist the runner lengthways and drive a bolt through each tab and into the main metal stud.
7. Install the Drywall
Mount the drywall by driving type S fine-threaded screws into the metal studs. It is advisable to drive the screws along a single stud before proceeding to the next one.
Be sure to work towards the open C-shape of the metal studs.


