Self Building
How to Finish Concrete Floor Like a Pro in 7 Steps
A guide to finishing a concrete slab, from spreading to troweling.

Finishing a concrete floor is not as challenging as one might think. It is a task that requires the right tools and attitude, and any beginner can complete it with apparent ease.
This article will help you know how to finish concrete floors like a professional. Before we get into the steps, here is a list of concrete finishing tools you will need.
Concrete finish tools
- Concrete screed – Used for the initial smoothening of newly laid concrete.
- Concrete Darby – This is a long, flat tool with two handles on a flat plate with slightly lipped edges. It is used to smoothen a concrete slab.
- Concrete floats – Used for removing ridges, filling cavities and polishing the surface.
- Concrete groover – Used for jointing concrete to prevent cracks.
- Concrete finishing trowel – This is used for the final smoothening of the slab at the end of the process for finishing.
- Concrete finishing broom – These brooms have softer bristles for creating texture in slabs, either for decoration or to prevent slipping.
Now let us start with our concrete smoothening work.
Step 1. Spread the concrete
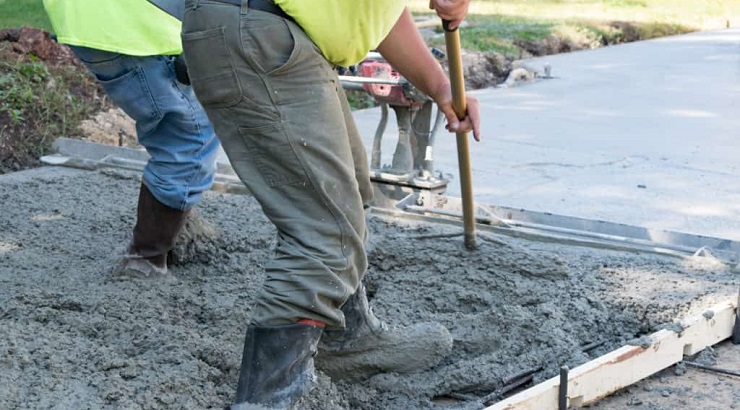
As the concrete is poured into place, a crew should follow up immediately with square shovels or other tools and instruments to push and pull around the wet concrete so that the form is filled entirely and evenly.
Furthermore, immediately after placing, the form should look full, and the surface should be level. If needed, use a trowel or flat shovel to move wet mix from high spots and fill voids.
To avoid air pockets, gently tap the form on all sides with a hammer. This vibrates the wet concrete and aids in its settlement.
Step 2. Screed the concrete
This is the removal of excess concrete and leveling of the concrete surface. This is done with a straight 2×4 lumber, which is commonly known as a screed board.
Sweep the screed board across the forms—like blockades holding the concrete in place—with the sawing motion from back and forth, either push or pull the 2×4.
Drive concrete into voids and low spots in front of the screed and thus fill up the space. Do this over and over again to remove all excess concrete.
There’s no need to smooth the concrete, just make it uniformly flat. You might want to do this by screeding three or four times, or more.
Step 3. Float the surface
This process levels the ridges, fills spaces created by screeding, and embeds uneven aggregate for smoother finishing.
It is the process of compressing the surface, reducing swellings, and filling spaces by sweeping a concrete Darby in overlapping curves. Some water will float on the slab; this shall be allowed to disappear before the next stage is pursued.
Step 4. Edge the concrete
After the water has disappeared, push an edging tool back and forth along the edge of the form. Raise the main edge a little.
Use an edger to make long strokes, working the aggregate back until you get smooth and rounded edges along the border of the slab.
Step 5. Create groove joints
This is a very vital step in concrete finishing. It involves cutting grooves or what is otherwise known as control joints into the concrete slab. This prevents or minimizes eventual cracking.
Grooves work to direct cracks in such a manner that the looks and functionality of the concrete slab are minimally compromised.
Use a grooving tool to mark grooves 25% of the depth of the concrete. The space between the grooves shall not be more than 24 times the slab depth.
RELATED: Popular Types of Flooring Materials for Modern Homes
Grooves should be made on all the inside corners of the concrete slab and at every corner that comes into contact with a building or step. These spots are usually susceptible to crack development.
After doing this, you should now float and trowel the surface to smooth and compact it.
Step 6. Trowel the surface
At the early stages of finishing, the surface is flat and even but perhaps has a spiky texture.
Depending on what you want, brooming at this stage creates an even texture while troweling at this point gives a smoother surface.
For a smoother finish, trowel immediately after adding expansion joints. To avoid marring the finished work, start at a far edge and work backward.
RELATED: Most Popular Types of Concrete Floor Finishes
Keep the trowel nearly flat with moderate downward pressure, but always keep the leading edge slightly raised off the surface, and use broad, sweeping motions.
Step 7. Seal the slab
Cure the concrete, and keep it free from traffic, fallen material, and rain showers for at least 24 hours. Use scrap lumber and tarps for covering.
Avoid stepping on it for 3–4 days and driving for a week.
Seal the concrete for protection after 28 days.
A protective sealer should be applied after 30 days of exposure to avoid staining or shortening the life of the slab.
Safety precautions
Always wear rubber gloves and safety glasses when working with wet concrete to protect yourself from chemical burns.
Wear long pants and a long-sleeved shirt; also, wear rubber boots if you stand on the wet concrete.
If it comes into contact with the skin, irrigate the affected area with plain water immediately.


