Self Building
How to Install Hardwood Floor
A step-by-step guide for installing wood floors in your home.

A successful wood floor installation is one of the most fulfilling do-it-yourself projects – giving you a highly rewarding sense of accomplishment.
Below is a step-by-step guide to installing wood floors in your home.
Editor’s Note: Before we get started, let’s cover a few basics.
Safety considerations
Use proper precautions when cutting wood to be installed. Safety glasses, safety masks, work gloves and ear protection should be worn.
Additionally, for added safety, consider wearing steel-toed boots, especially when using a pneumatic nail gun during the installation process.
Tools
For a successful installation, you need tools like a tapping block, moisture meter, nail setter, claw hammer, table saw, jigsaw, mallet, chalk reel, ¾-inch spacers, long level, and a pneumatic nailer or flooring nailer (optional).
You also need measuring tools such as a tape measure, a pry bar, and a drill with bits.
Do not forget about safety equipment such as safety glasses, safety masks, work gloves, ear plugs, knee pads, punches, or nail setters.
Add to this a chalk line and a staple gun to make the process a little easier.
Materials
Be sure to collect the necessary materials in advance.
You’ll need hardwood, vapor barrier paper, flooring and underlayment, nails, wood putty, and collated flooring nails.
Make sure you have these materials ready to ensure a smooth and efficient wood floor installation.
Wood floor installation
Here is a guideline for the installation of nail-in hardwood floors.
1. Collect the materials in advance
Begin by selecting the hardwood that you want to install. You will then start to determine the amount of space you want to install hardwood flooring.
Once measured, add an extra 5% to allow for cutting, or up to 10% if the hardwood is to be placed in a diagonal position. Always round up when ordering your hardwood.
2. Allow wood to acclimate
The hardwood floor has to adapt to the home’s climate.
It’s best to do so 5 days before installation, maintaining 75 degrees with 30-55% humidity to reduce the chances of the hardwood expanding or contracting.
3. Set the area for installation
Remove baseboards. Check the existing subfloor for plumbness and flatness.
Install a suitable subfloor where it is missing. Determine the layout of the floor joists and ensure the subfloor is level and ready for underlayment across the entire floor base.
Spread a 15 to 30-pound asphalt-saturated felt, silicone shield, or vapor barrier paper to protect floors and subfloors from ground moisture and spillage.
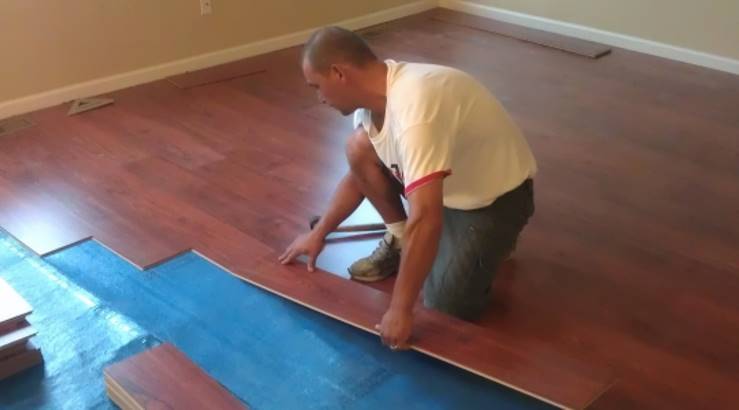
4. Install hardwood floor boards
Select the straightest boards for the first two rows. Face nail the first rows and the remaining ones by the tongue with a pneumatic floor nailer.
If a pneumatic floor nailer is not at hand, drill a 1/32-inch diameter hole ½ inch from the grooved edge.
- Chalk a line and lay the first board along it, with the groove toward the wall. Place ¾-inch spacers along the length and between the wall and the end of the board to provide an expansion gap.
- Nail into the pre-drilled holes using 6d or 8d flooring nails.
- Tap the following board into position gently with a mallet and blind-nail it. That is, at an angle of 45 degrees through the tongue, to hide the nail under the groove of the next board, in tongue-and-groove flooring.
- Sink nails below the surface using a nail punch to prevent joint interference, then fill the hole with matching putty.
- Trim the board to fit at the end, allowing a ¾-inch gap for expansion.
- Nail at an angle of 45 degrees throughout the length of the row, nailing at every floor joist and along the tongue edge.
- Form a new row by inserting the groove into the tongue of the first row and tap into place with a tapping block. The joists are spaced 6 inches in the center and fastened at the end of the row with nails.
- Follow the rest of the hardwood boards, changing sources, staggering joints, and leaving room for expansion. After the third row, use a pneumatic floor nailer, tapping with a mallet. Use a jigsaw for tight cuts.
- Face-nail the final two rows on the tongue side. Drill 1/32-inch pilot holes ½-inch from the edge. Trim boards for the last row, leaving a ¾-inch gap for expansion. Use a pull bar for alignment and face-nail.
- Trim excess underlayment, sand, and stain. Fill nail holes with matching wood putty.
RELATED: Popular Types of Floors for Modern Homes
5. Install baseboards
As the baseboards are installed over the expansion gap, they will cover it once they’re replaced.
Just ensure that the bottom of the baseboard is flush with the top of the floor and nail it in place against the wall.
RELATED: Engineered Wood vs. Hardwood Flooring
Then, nail the shoe molding to the baseboard but do not nail it to the floor or subfloor.
6. Install threshold or transition strips
Threshold or transition strips should be placed at the floor edge that happens to be exposed. This allows for a continuous, attractive transition from one flooring surface to another.
By abiding by this suite of steps above, DIY hardwood flooring installation can very well be within reach. For all inexperienced persons who would like a successful finish with absolutely no waste, a professional should be hired.


